iPhone-Charging USGI Flashlight


Last week I ordered a MintyBoost charging kit from AdaFruit. The MintyBoost is a circuit that takes power from a pair of AA batteries and outputs 5v through a USB port, so you can charge your phone or other similar device where you might not have access to another power source. It gets its name because it’s commonly built into an Altoids mint tin, but I wanted something a little heavier duty than candy and tiny batteries.
The MintyBoost kit was well-documented and went together quickly. I verified that it worked with a pair of AA batteries in the provided battery holder, then started hunting around for more power.
AA batteries have a capacity of about 2800mAh (milliAmp hours). The iPhone 4s I would most likely be charging has a battery capacity of about 1400mAh. When you figure in the inefficiencies of the charger, the fact that batteries usually overstate their capacity, and other factors, it turns out that the AA batteries might top off a phone that’s down to about 1/4 power. That’s it. Then you need to get a new pair of AAs.
On the other hand, D-cell batteries have a capacity of almost 15,000mAh—over 5x that of AA batteries. I just needed a good case to hold the D batteries and the MintyBoost, and what better than a flashlight?
I scrounged through a box of junk and found an old USGI right-angle flashlight. These things are uglier and tougher than almost anything around, and mine was no exception on either count, scarred up from who-knows-how-many youthful camping trips and midnight troublemaking expeditions.

The source material: an old USGI right-angle flashlight and an Adafruit Mintyboost circuit.
The USGI flashlight comes apart in a ton of different places. There are two tail caps: one to hold an assortment of lens filters and the other to provide access to the battery compartment. A ring screws off of the front of the lens to hold a filter, and the bulb assembly screws out of the head of the flashlight. I figured that somewhere in there would be room for the tiny MintyBoost.

The flashlight disassembled. There’s a lot of room in there.
I poked the circuit into various nooks & crannies of the flashlight, trying to see where it would fit best. One possibility was in the head of the flashlight behind the bulb assembly.

The MintyBoost in the head of the flashlight.
Another likely spot was in the tail cap where there’s a compartment for storing a spare bulb.

MintyBoost in the tail cap.
I decided on the tailcap, but not poking out the side like in the picture above. Rather, it would come out the rear of the flashlight. There was a reinforcing area for the D-ring that was exactly the right size for the USB port and would provide a solid surface for mounting. It would also be easier to put an on-off switch on the flat base than on the head or out the side of the flashlight.
After milling a slot in the tail cap, I squared the corners with a knife.

A slot for the USB port.
Neither of the two tailcaps on their own had enough room, but together they were quite spacious. I only needed to open the wall between them. To do this, I chucked a small flush-cutting bit into the router and ran it around the inside of the cap. It’s a little bit rough, but the picture below is the last time anyone will see the inside anyway. Doing this sacrificed the storage for the filters, but I never used them in the first place.

The solid base routed out of the battery cap.
Even when it’s not in use, a circuit can like this can draw a minuscule amount of power and drain the batteries over time, so I added an on/off switch in the tail cap to control the power to the MintyBoost. In reality, it’s completely unnecessary since the batteries would probably leak and corrode before the unused charger emptied them, but why not wear suspenders with that belt? The charger operates completely independently of the flashlight; either can be on or off regardless of the state of the other.

Countersinking holes for the switch mounting screws.
I attached the MintyBoost with high-strength two-part epoxy on three sides of the USB port and on the edge of the circuit board where it made contact with the inside of the tail cap.

The finished cap.
The cap looked great on its own, but now I had to get power to it. I could tap right into the spring in the tail cap for the negative terminal, but for positive I’d have to run a wire from the head. I soldered a wire to the springy copper strip that contacts the bulb and ran it down through the battery compartment. There’s plenty of room in the battery tube for a wire held down with electrical tape.

The positive terminal at the head of the flashlight, showing the line feeding to the charger.
In the tail cap, I ran the negative wire to a bent strip of copper I made to hang over the lip that the battery spring rests on. Since the copper strip stays in place as the cap screws on (and the spring possibly rotates with it), it’s one less wire to get tangled up. Things weren’t so easy with the positive wire, but it works well enough to run the wire through the spring so that as the cap and spring are screwed on, the wire rotates through the spiral.

The MintyBoost circuit inside the tail cap.
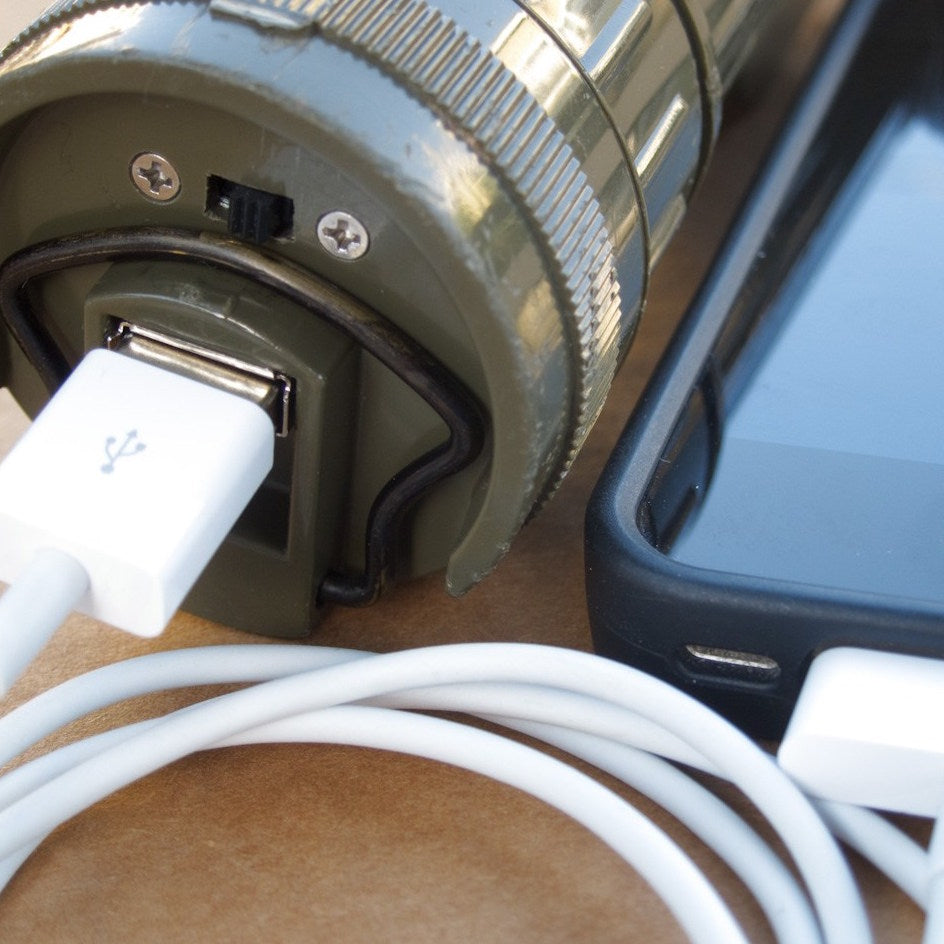
With everything screwed together, I plugged in the iPhone and flipped the switch on the base of the flashlight. Ahhh, the relief of hearing that sweet beep-boop from the phone as it acknowledged the charge. It works!

It charges!
To save the flashlight batteries even more I swapped the incandescent bulb for a drop-in LED replacement. It’s not too bright, as far as modern LED technology goes, but it’s still brighter than the original bulb and should ensure that using the flashlight as an actual flashlight will still leave plenty of juice for a phone charge.

Using the flashlight to charge my iPhone, so I can use its flashlight too.
I’m going to use it next week to charge up on a supported long-distance bike ride (meaning someone drives my gear—including this—to the campsite while I pedal there). After that it’ll probably stay in the back of the car as an emergency light/charger.
So, what to call it? It’s a MintyBoost at its heart, but the flashlight’s green is more of an olive. So how about the OliveDrabbyBoost?
Leave a comment
Comments will be approved before showing up.
Also in Projects

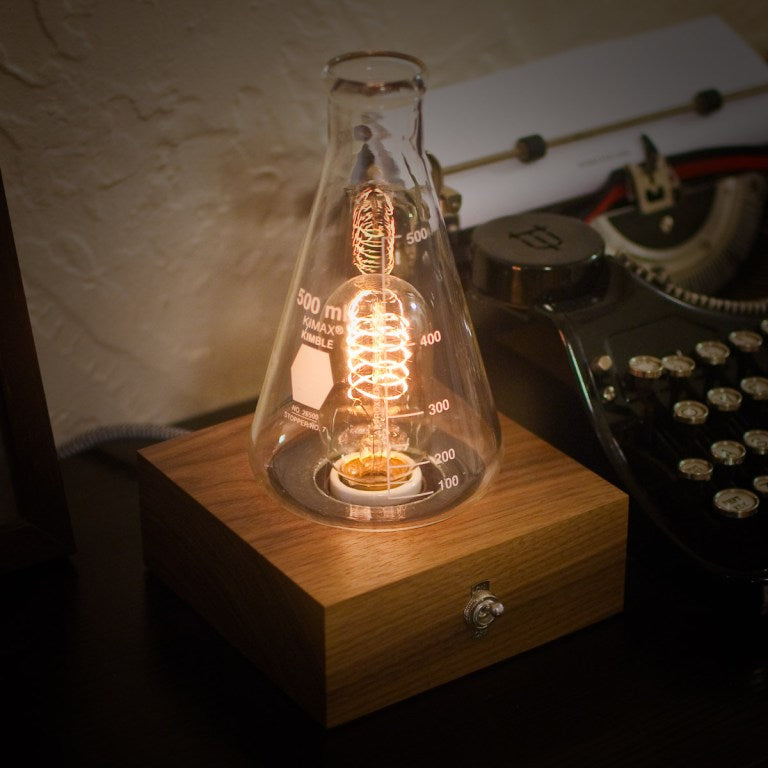
The Laboratory Lamp
First created in 1860, the Erlenmeyer flask has come to symbolize chemistry, and by extension science as a whole. I wanted to use that symbol to create an item of functional decor, and what better for that than a lamp, with the relationship between the light bulb and the “aha!” of an idea?

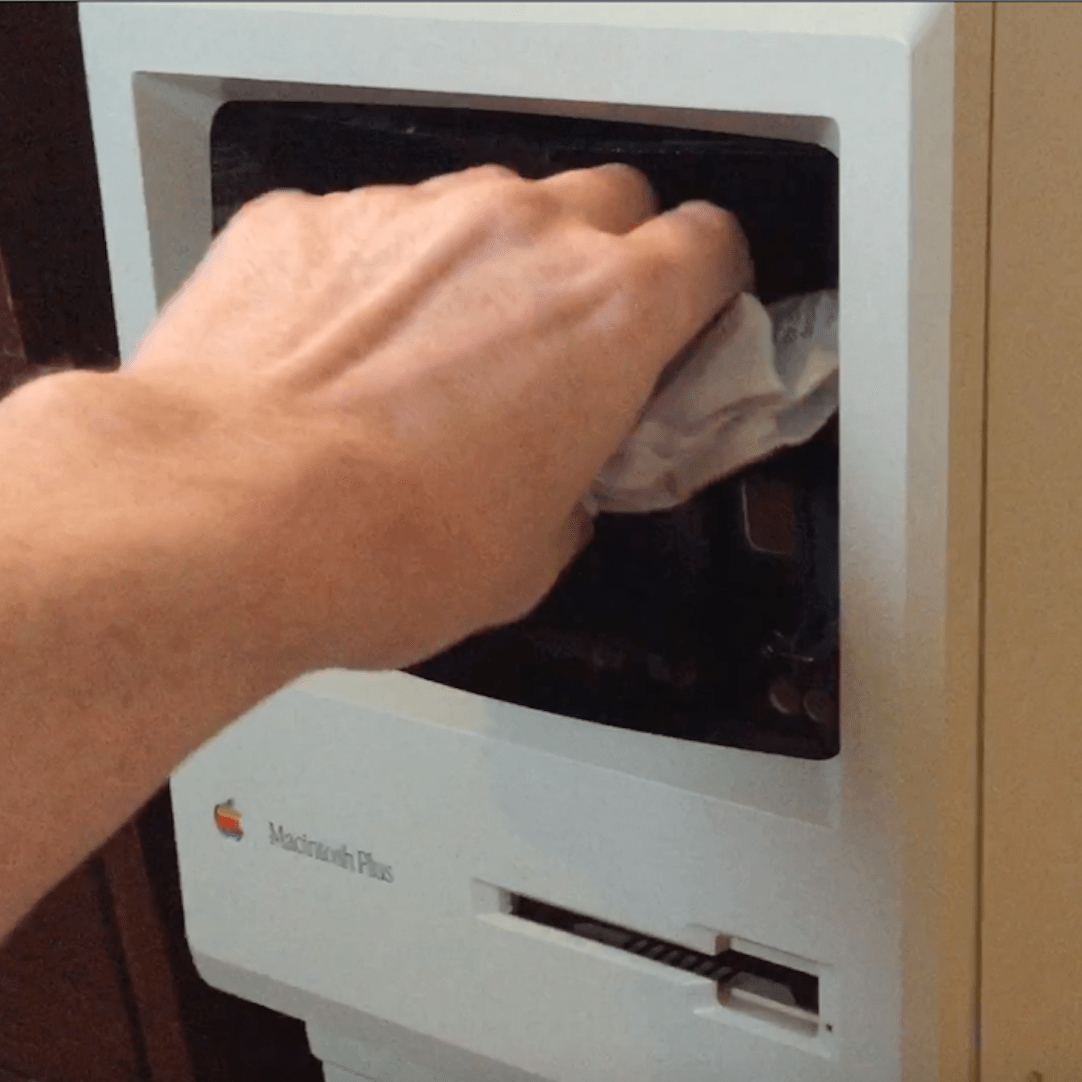
Garbage In, Garbage Out
For over a decade I’ve had kicking around in my garage’s attic the cases from a couple of old original-style Macintoshes, waiting for just the right project.
One day, after staring at them stacked in my office, I realized that they had a similar form factor to the classic bullet-top garbage cans with the swinging lid. I could give one of these a new (slightly unceremonious) life as a garbage can!

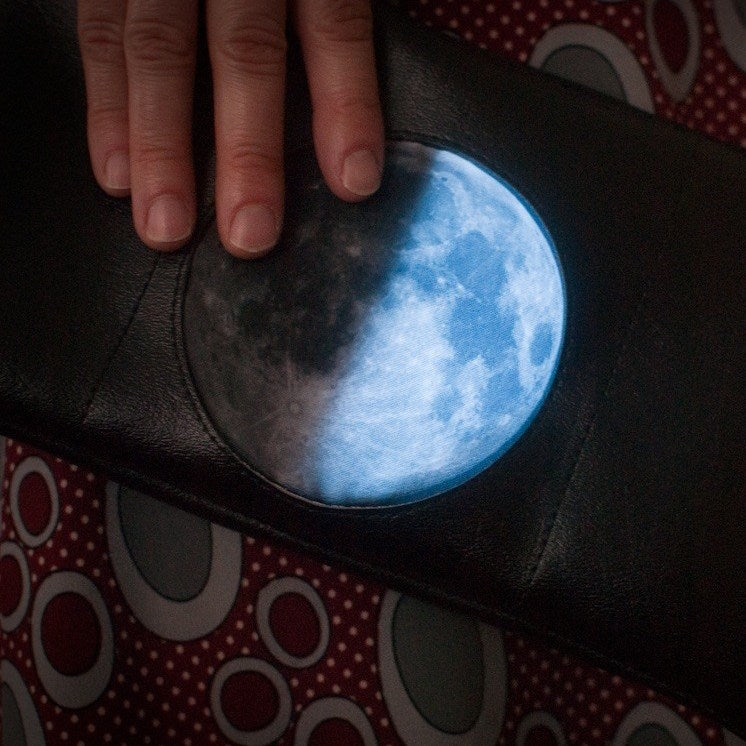
Moon Phase Purse
I’ve been going through a moon phase recently (pun absolutely intended), and thought it would be fun to make a wearable or totable that displayed the current state of the moon. There would be a bit of hardware involved, so a purse seemed like the perfect vehicle—you’re already carrying a load of other things, so there’s no harm in the addition of a small battery pack or a pile of LEDs.